|
How To Effectively Analyze Any Types Of Electronic Equipment And Be An Expert On that Field
Have you ever asked yourself how to be good in electronic repair? Have you ever wondered how those professional electronic repairers are so good in the equipment they are repairing? Why they can easily locate the faults where else it took me such a long time to repair the problem? The questions could go on and on and you are puzzling to yourself as why others can be successful in the electronic repair line and you don’t? In fact there are no secrets; it requires only your time and some knowledge about electronics. Sometimes, having only the related repair information such as schematic diagrams, electronic repair books, and visiting forums may not be enough to truly understand the particular electronic equipment, in fact you need to analyze the equipment fully!
Now not many people are able to follow what I’m going to share afterward but if you could follow then it would be great as you can use the method to analyze your type of electronic equipment. I’m only using the CRT Monitor as a sample and hope that you will get some ideas and practice it in the electronic equipment you want to analyze later.
Before you want to analyze any electronic equipment, you must have a schematic diagram for that model and spare components. Just in case if you blown up any parts, you will still be able to recognize the coding or types of electronic components and find a replacement for it. If you do not have the schematic diagram then I suggest you to postpone the analyzing of the equipment until you got hold of the schematic diagram. I just don’t want you to regret when you can’t find the value of the burnt components and without the right value you can’t fix back the equipment.
Another main thing that you must also have is that you must be well prepared and ready for the test. Not many people dare to do such test like voltage testing, switching “On” the equipment without load and etc. Don’t worry I will list down what I had went through so that you would not follow my path and blown up some important components. What I’ve already tested was CRT Monitor but I do not know what kind of equipment you want to analyze. It could be a big projector TV, LCD and Plasma TV, machinery control equipment and etc. Whatever the equipment it is I hope that you will know what you are doing and the consequences that you going to face just in case if the equipment would not work again after some test. Here are the examples of how one can learn more things in CRT Monitor repair compare to when you just read theories of how a CRT Monitor work. You will definitely have a better understanding in the electronic equipment you wanted to repair. Let’s begin!
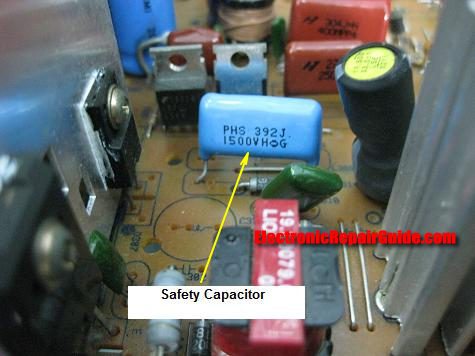
Many years back during my early time of repairing CRT Monitors I did took out the safety capacitor (hold down capacitor) from the board. The moment I switched “On” the monitor, I could hear a sudden high voltage sound and then the high voltage collapse and the power LED start blinking! Before that the Monitor was just working fine but after the removal of the safety capacitor, the Monitor has the “chirp-chirp” sound from the power supply (possibly indicating something shorted in the secondary side). Upon inspection I found that the horizontal output transistor (HOT) was completely shorted. I replaced with a new HOT and soldered back the safety capacitor and the Monitor worked as normal again.
What lesson did I learn from this test? If I come across any HOT failure in the future I will first test out the safety capacitor value before I replace with a new HOT and switch “On” the Monitor. In fact I did come across before that some cases of HOT failure was indeed an open safety capacitor. This test has really saved up my repair time. Not only that, whenever if there is any high voltage problem (assuming high voltage shutdown) I will first test out the safety capacitor first.
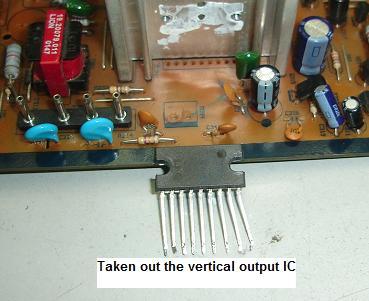
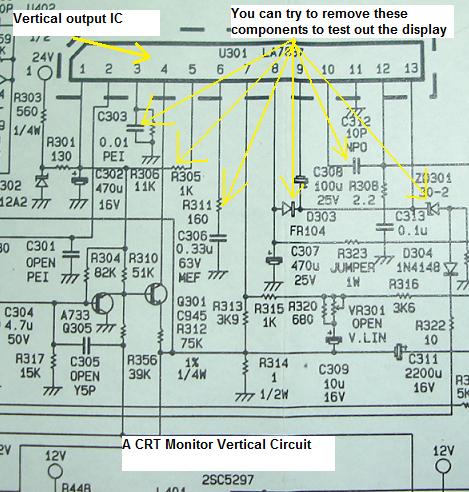
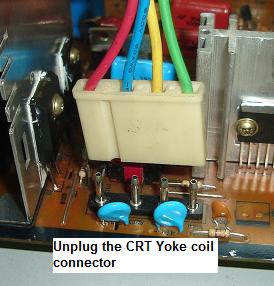
Let’s take a look at the vertical output IC, if you have removed the vertical output IC and power “On”, the display will surely turn into one horizontal line across the screen. With this kind of test, in future you would know where to check if you come across whether a CRT Monitor or TV that have one horizontal line across the screen. Please keep in mind that an open vertical yoke coil could also cause similar problem and don’t just focus on the vertical IC only! Check the supply voltage and make sure there are no dry joints in this area.
If you have the time you can go further beyond just the removal of the vertical IC only, in fact you can remove one by one the surrounding components in the vertical section to see how the display looks like and you can always draw and jot down the test result. You will be surprise to see some funny display that you have never seen before. The display can be too small (about few inches height), too big vertically, top or bottom part missing, become rainbow display or even the Monitor totally shutdown. The more you do such test on the vertical section, the more you will not afraid anymore of vertical section problem because you will know where and how to tackle it. This is the message or tips that I want to convey to you in this whole article.
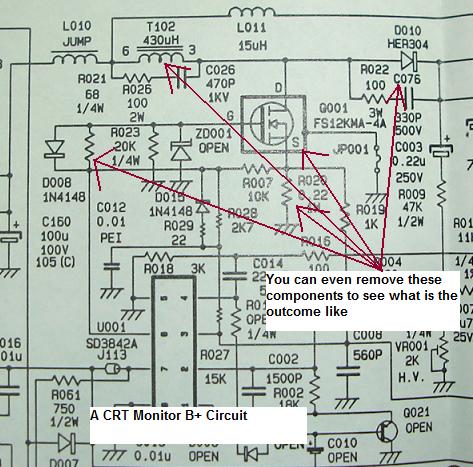
These are the only two examples that I have just shared with you and in order for you to be good in Monitor repairing you can perform similar test on B+ circuit section, high voltage, horizontal size and pincushion, colour, EEprom IC and even power section too. You may even pull out the focus and the screen voltage (G2) wire from the CRT board and see what would happen to the display.
Apart from reading technical books and analyzing schematic diagrams I can say that such test that I have just described could easily turn you to become a professional if you diligently record down what are all the results like after each test. It could just takes you couples of days to perform such test. You have seen more problems than anyone else and whenever there is a problem in Monitor; your mind would be the first to tell you where to begin to check instead of guessing where to check first. Isn’t it wonderful to know where the culprits are the moment you switch “On” the Monitor? You would no longer have to struggle anymore to get the answer and the repair time can cut short into half! Not only that, you can also be the guru in your repair field. There are no secrets about this, what we need is your commitment in performing such test and willingly to take the risk if there are components burnt and worst case if the equipment totally can’t function after the test.
Look at me, my early years was more on the CRT Monitor repair but then came the LCD Monitor. How do I cope up with such a new design and circuits? Again my answer to you is to test it out yourself! I have performed lots of test, repair, trials and errors before I could come out with the LCD Monitor Repair E-book and the course.
These are the test result that you can’t learn from any repair books. You have been there, seen it, touched it, replaced it and solved the problems. You would not easily forget with such a test like this! The experiences from this kind of test and analysis of how one component failed could affect other components can be your added skill in troubleshooting and repairing many other electronic equipment. I urge you to practice this kind of test in your type of equipment and it is definitely worth the time you have spent in such a test like this. Happy Analyzing and Testing!
Conclusion
Upgrade your Flash Player to version 8 to view this video! (Click here for the download)
|
|
Copyright@ 2006-2014-www.ElectronicRepairGuide.com All Rights Reserved
