How To Easily Solve Intermittent Problems In Electronic Circuits
Troubleshooting and repairing electronic solid problems like no power, no display, color out and etc could be very straightforward if you know the right way to do it. For example, a replacement of fuse restored the equipment back to life. It’s easy and very direct but there are problems in the electronic circuits that can silently “steal” away your precious time if you do not know how to efficiently tackle the problems. The problem that I’m referring to is the “intermittent problems”.
The word “intermittent” according to dictionary dot com means “alternately functioning and not functioning or alternately functioning properly and improperly”. Take Monitor for instance, the red color may go off and comes back by itself or when you gently knock on the Monitor casing or cover. That’s right, any electronic components and circuits may or may not have the tendency to go intermittent and it all depends on the circuit designs, quality of components, environment and other factors.
In some tough dog (difficult to repair) cases, a Monitor can work well for 8 hours and then suddenly just go off. When you switch the Monitor off and then switch it “On”, the Monitor will again work for couples of hours before shutting it down. If you do not know the right and absolute way to solve this “intermittent problem”, troubleshooting time will be lost and at the end you still could not locate the fault. Sometimes it is very frustrated too to locate intermittent problem because you just do not know where to begin.
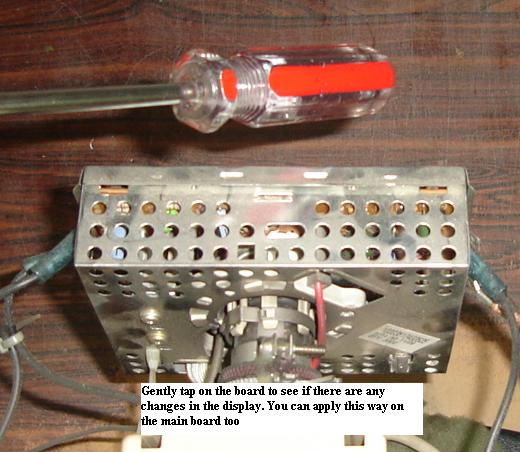
Whenever you tap on the board (in all directions) with the handle of the screw driver, the display stop waving! In other words, no matter where you tap the board, the display shows some response. You may ask yourself these questions “should I check the primary side or the secondary side?” “Should I resolder the whole board (will take you lots of hours)?” “Should I replace all the suspected components in a particular circuit?” and the questions can go on and on. The answers to your questions are it depends on how the problems surface. In this article, I’m going to reveal all the possible ways that can cause intermittent problem and how to solve it.
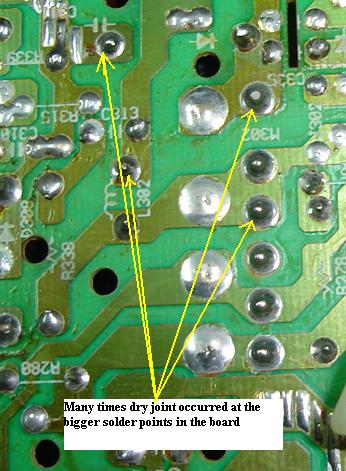
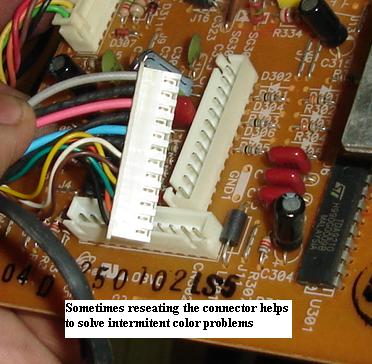
The most obvious intermittent problem is when you hit the board with the handle of screw driver; there will be effect on the equipment. Take Monitor as an example, if you noticed that the display color flashes on and off, the first thing you do is to head to the CRT board section. Gently tap the CRT board with the handle of the screw driver; you could see that the display now will come back to normal. This is an absolute problem on a specific location (CRT board only) where you can easily detect and solve it by resoldering the joints (apply fresh solder to joints), reinsert the CRT board socket to the PC tube and reseat (unplugging and plugging several times) the VGA color signal cable.
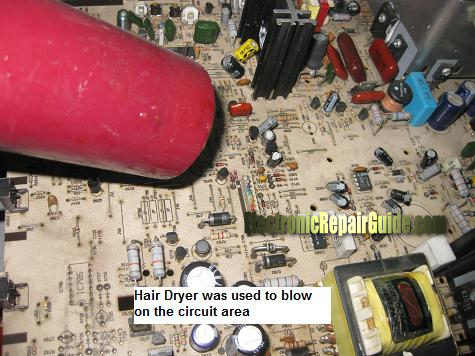
Next is the thermal intermittent problem, where a component works okay when it is cool and problem arises when in the high temperature. In order to detect such problem, we need to use a little heat so that the problem can surface faster without you wasting hours to wait for it to happen. By placing a 100 watt bulb near the board of the equipment, the circuits will become quite warm after a few minutes. You may also use a hair dryer to point or focus on the circuit board. Be careful not to overheat the circuits as some plastic materials can be easily damaged or melt. Once the problem appears when it is hot, now is the time you use a can of freezer or spray cooler to rapidly cool the circuit components. A spray tube is included to control the application closely. Thus it is easy to confine the spray to one component at a time. Usually the circuit freezer temperature is about minus 40 Celsius. Once the faulty or intermittent component sprayed by the cold temperature, it will begin to work properly and the problem will immediately disappear. Most of the time using this method can help you to locate the bad components right to the spot.
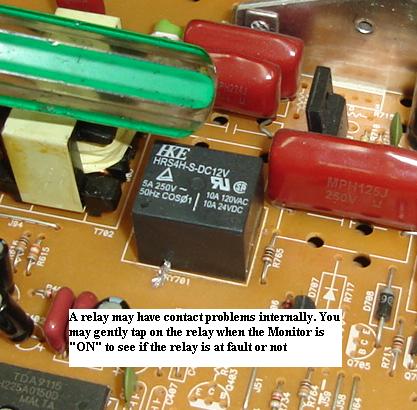
A loose contact inside relays also may develop intermittent problem. Just tap on the relay when the equipment is working to see if there are any changes. Be careful when you are tapping the relay as the power is on. Replace with a new relay if you suspect it is the cause of the intermittent problem. Do you know that some technicians cut open the relay to service the internal contact with sand paper? You may try that method if you wish to.
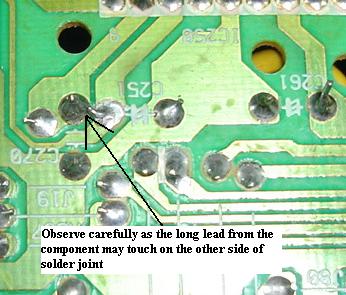
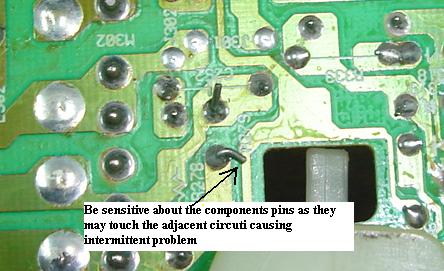
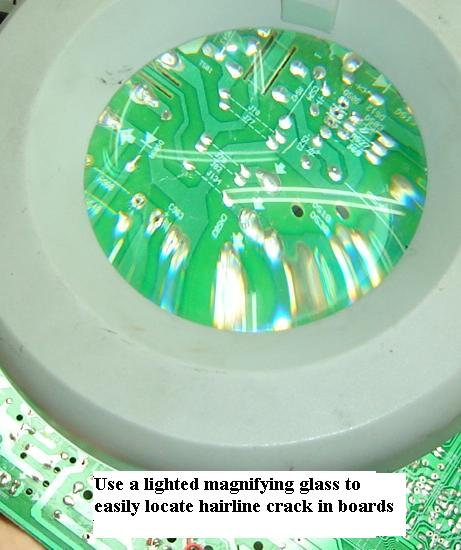
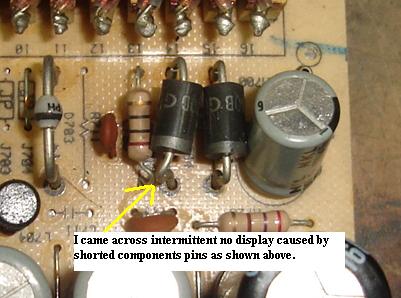
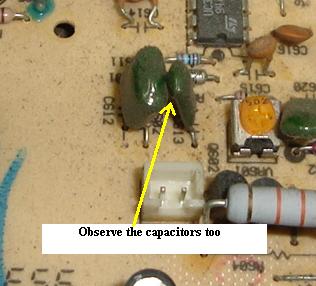
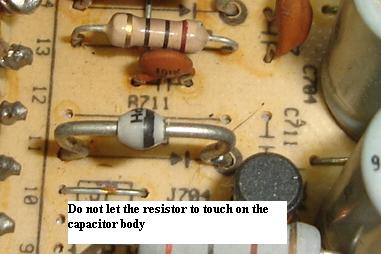
Certain intermittent problems were not due to faulty components; in fact it was the board itself and the soldering or designs that causes the problems. Take a look at the bottom photos where you could clearly see that a component’s lead is touching on the other track, a component’s lead is touching on the other lead and some hairline cracked in the circuit track cause by a fall or some severe vibration! The hairline cracked can be easily seen by using a lighted magnifying glass.
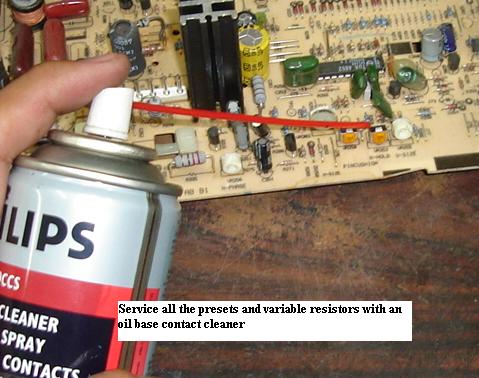
Some boards have small presets and variable resistors (VR) on it thus it may be necessary to service those components after few years the equipment in service. The wiper inside the variable resistors can accumulate dust and causing intermittent in controlling the sound, display and etc. Just use a can of Philips oil base spray and spray into the variable resistors and it will work as good as new. However, after servicing the variable resistor and there is no improvement, then it’s the time to replace with a new VR. Please do not use a video head cleaner to service a VR as it will dry up fast and the intermittent may rise again.
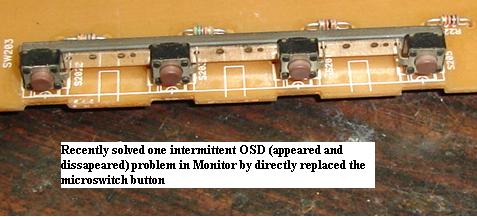
Another component that you need to watch is the microswitch button. It may check good testing with a multimeter but breakdown when the equipment is running. Isolate all possibilities in order to successfully repair an intermittent problem. If possible just direct replace the switch and who knows the intermittent problem can be fixed!
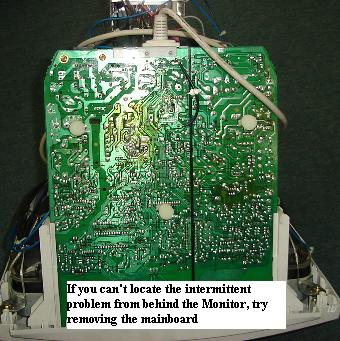
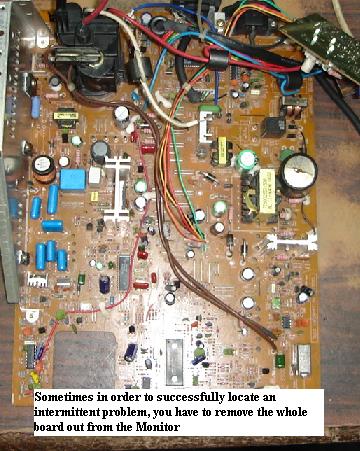
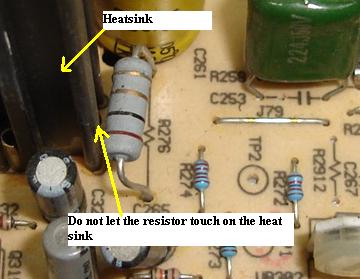
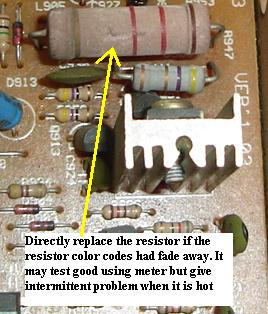
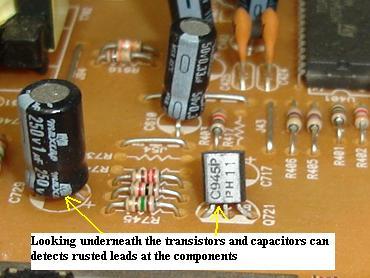
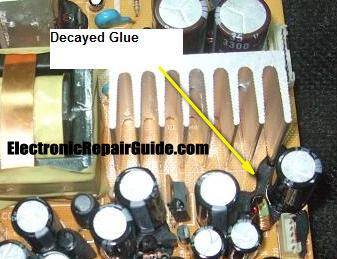
Many technicians do not know that besides tackling the intermittent problem from behind the board, one must also be sensitive that many intermittent problems can be solved by removing the whole board because you could clearly see all area and all possible causes that made up the intermittent problems. Diode lead shorted to resistor lead, capacitors shorted with each others, resistor body touching the heatsink, resistor shorted to capacitor body, decayed glue in many parts of the circuit (you need to remove it), fading resistors color bands and many more. Carefully study the photos below and begin to absorb all the information that can help you to locate an intermittent problem fast.
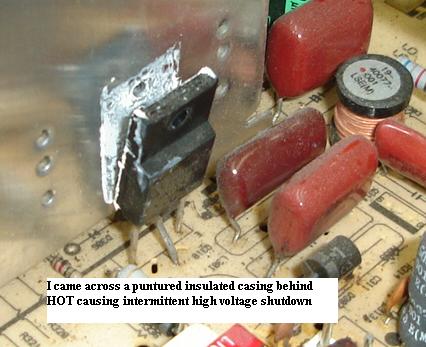
There was one case where the Monitor was switch “on”, it has intermittent shutdown problem. I really spent lots of time trying to tackle the faults from behind the board. Flyback transformer replaced, PC tube changed, voltage testing on all circuits to be okay, but somehow I just could not locate the cause of the problem. This is where you can see the real frustration face of Jestine Yong if you are beside me. To cut long story short, I removed the board and begin to see from “in front”. Yet no obvious signs of problem can be detected. Since the board already had been removed, I just try opening up the HOT, to my surprised the back of HOT have a slight burnt mark on it. It causes a slight spark to the heatsink and shutting down the Monitor intermittently. The good news was that there were many similar cases happened to this model of Monitor. It just took me a couple of minutes to solve it. Who knows this problem could be happen in TV and others electronic equipment too. Not only that, the experienced that I learned from this case had help me to narrow down any possible cause especially dealing with transistors that attached to heatsink.
Before I jump to the conclusion, I have a question for you. Click on this photo, and try to find out what’s the problem with this Monitor board. What did you see from the photo?
Intermittent problems can be tough to work on if you do not know the necessary steps to tackle it. Use every information in this article to localize the problem because it is far easier to check and test a few things than to check every joint, contact, and component in the equipment. Have a great hunt my friend!
The answer is a staple short across a jumper and a resistor at the center of the photo.
|
|
Copyright@ 2006-2014-www.ElectronicRepairGuide.com All Rights Reserved
