|
How To Make Full Use Of Your ESR Meter
Among the best meter that I use for troubleshooting and repairing electronic circuit problem is the ESR meter. In the mid of 80’s my electronic lecturer taught me how to use analog meter to check on all types of capacitors which include the electrolytic capacitors. He said that if the needle/pointer kicks up and slowly drops back/discharge then the capacitor is considered good. From that day onwards I always use the method taught by my lecturer to test capacitors until I found the digital capacitance meter.
In the early 90’s while working for a new computer company, I was exposed to a digital multimeter that have the capability to test capacitors and the brand name is call Appa Test instrument. It has lots of capacitance ranges and I was able to find out many bad capacitors that the capacitance value had run. This meter had helped me solved lots of electronic circuit problems that caused by faulty capacitors be it the non-polarized cap or the polarized cap (electrolytic capacitors). I told myself that this is the best test equipment to check on capacitors. Although at that time I have the analog and the digital multimeter (with the capacitance tester) I was not able to repair certain circuit problem. I will tell you the reason in the next two paragraphs as to why I can’t solve certain problem in the electronic circuit.
After two years with the company I decided to continue with my study and in the year of 1996 I set up my company (Noahtech Computer Repairing and Services) with my good friend. As usual my job there was to repair Computer Monitor and Power supply (AT and ATX) and again there were also some electronic problems that I could not solve. That means I had returned quite a number of units of equipment back to customers without knowing what causes the failure. At that time I have the stand alone digital capacitance meter that have nine ranges to test all kinds of capacitor values. Of course I did spend sometimes on the bad board but I just could not locate the problem.
I always trust that my digital capacitance meter had done a good job but did not realizing it that certain caps tested good but failed when test with ESR meter. Due to this I could not find out the fault because I had missed a bad capacitor.
During that time the internet connection had just started in my country and I could still remember the repairing websites by Sam Goldwasser on certain electronic topics. I was excited by the way he shared and compiled all those electronics resources. Somewhere in 1998 or 1999 I joined an electronic repair forum (need to pay monthly fees) operated by John Bachman of AnatekCorp and I got to tell you that those techs at that time were superb in sharing all kinds of repairing techniques. One of the great topics shared was the ESR meter. Many of them have used the meter and fully recommended to all repair technicians. Testimonies upon testimonies were given and some of them said “as an electronic repairer you do not know what you are missing” –actually they were referring to the ESR meter and want all techs to have one in their repair bench.
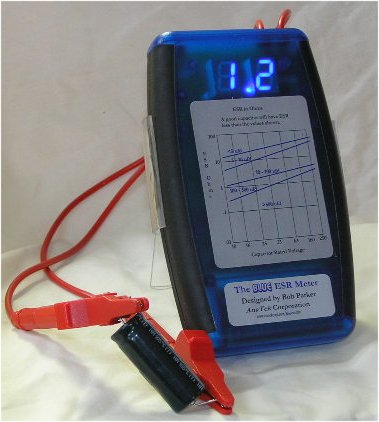
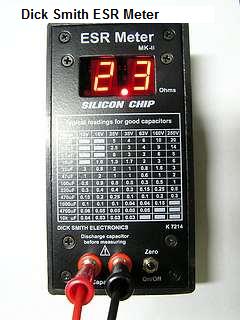
Since so many forum members recommending the Dick Smith ESR meter designed by Bob Parker, I bought one and fixed the kitset and began to test on the electronic board that have problem. So how was the test result using the meter? Let me tell you, it was the best test meter I’ve ever came across. It was fast in finding out those bad electrolytic capacitors and thus it has speed up my repair time and I can’t part away with this meter whenever I do my repair work. I just love the meter and it was fantastic-this is all that I can say!
Hope the introduction part doesn’t bore you away from reading this article. For those who are new in this repair field or to those just bought the Blue ESR meter you may find this article could be interesting as I will explain to you besides the capability of ESR meter to test on electrolytic capacitors, it also have some hidden gems where it can be use in testing other components which I’m going to share to you later. And for those of you who owned this meter many years ago and already knew some of the capabilities of this ESR meter hope that you can use this article to refresh again the usage of the meter. Let’s begin!
The designer of this ESR meter Bob parker primarily designed this meter to test only the electrolytic capacitors. Do you know that besides testing electrolytic capacitors it can also be use to test on other components as well? Here is the four other usage of this great ESR meter. (For your information Bob Parker had released the new version of ESR meter called the BLUE ESR METER and you can click here for more information).
Testing Non Polarized Capacitor
Actually I did not know that this meter could test on non polarized capacitor. There was one Philip Monitor came in for repair and the complaint was distorted picture with many horizontal white lines across the screen. I though the problem was easy to solve but somehow ended up taken more of my time then I was expected. Voltage to the vertical IC found ok, vertical coil resistance was fine, vertical oscillator IC replaced, corresponding components checked to be okay and yet I still could not locate the fault. Since there was one similar Monitor model I began to compare and test again the ESR reading of the electrolytic capacitors with the bad unit which located in the vertical circuitry.
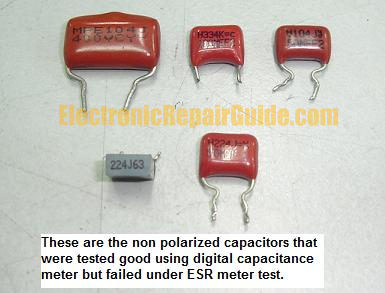
I accidentally measured a ceramic capacitor which I thought it was an electrolytic capacitor since I’m checking the board looking from behind. The result that I got was totally different from the good unit. I was surprised to know that it was actually a ceramic cap that I have already tested good before using my digital capacitance meter. The value was 224 (.22 micro farad) and a new replacement brought back a nice picture.
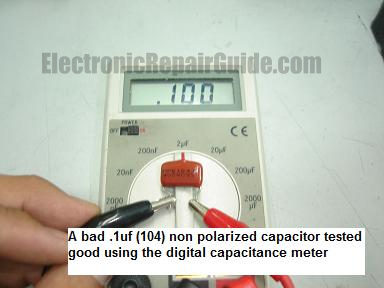
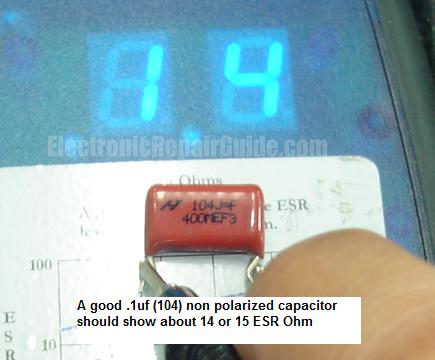
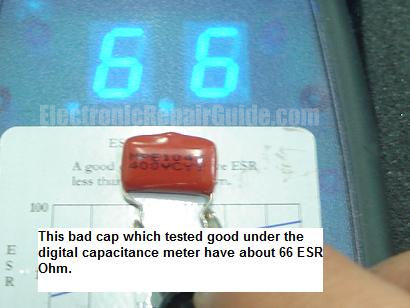
From that day onward I began to do some research on the non polarized capacitor since we can’t find any of this information from the ESR meter manual. My conclusion was that you can use the ESR meter to test on any non-polarized capacitor with the value of .1 uf and above. Lower than that value your ESR meter won’t show you any reading. If you look at the pictures below you could clearly see that a 104 (.1uf micro farad) capacitor tested good using a digital capacitance meter but failed when tested with a Blue ESR meter! Look at the ESR ohm range between the good and the bad capacitor, it has big different!
Click HERE TO PURCHASE THE BLUE ESR METER
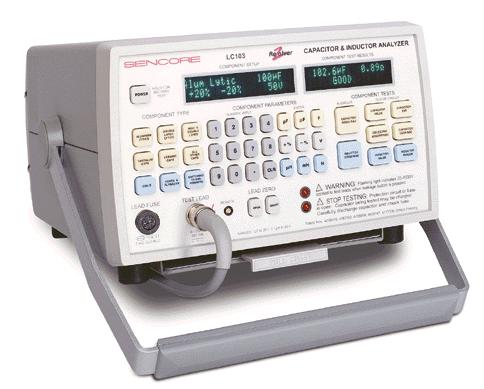
Since after discovered the capability of testing non-polarized capacitor, the overall way for me to test the capacitor had changed from not only one have to test the capacitance value, we must also test the ESR value too. Remember you must also test the non-polarized capacitor using analog meter set to X 10 K ohms to check if there is any breakdown in the internal insulation. I know that this is not the best way to test it but at least in some way it could help you out since the Sencore LC103 test equipment was not cheap and not affordable to many technicians. For your information the Sencore LC103 could perform the four tests on any capacitors i.e. the leakage test, ESR, Capacitance (value) and dielectric absorption.
Sometimes I wish that there will be someone that can design a meter (what I mean is kitset) that can test the ESR of non polarized capacitor that have the .1 uf value and below as I believe if the ESR value can change for cap that have the value of .1 uf and above, it could also change for the cap that have the value below .1 uf! It will be a big market if someone could come up with this special meter in the future and I’m gonna make sure that I will be his first customer!
For your information I found a non polarized capacitor ESR value increased to a very high Ohm in the power section causing no power and the digital capacitance meter tested the capacitor as good! A new capacitor brought the power back again for an ACER CRT Monitor. If you own this ESR meter, please make sure you test on the non-polarized capacitors which is found in most electronic boards and see what are the ESR Ohm values that you will get.
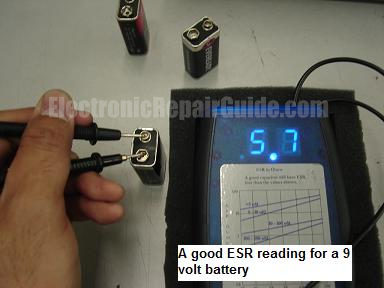
Testing on Batteries
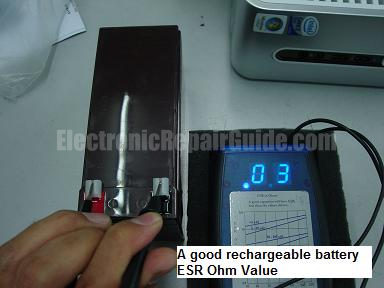
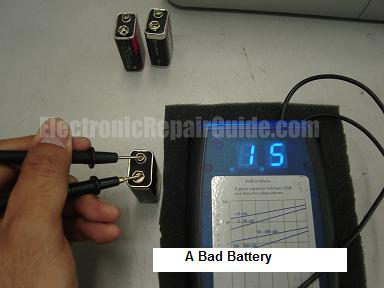
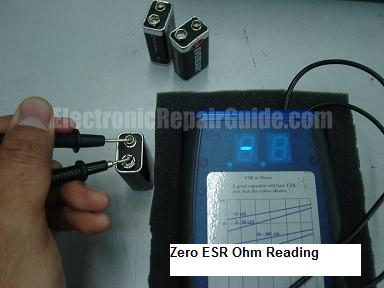
Yes, this meter can be use to test the ESR value of batteries be in the dry cell batteries or the rechargeable one. Just directly connect the Blue ESR meter test probes on either side of the battery terminals and see the reading. A good rechargeable battery should have a very low ohm ESR value and for a bad one the ESR could shoot up very high and sometimes no reading at all!
Do you know that those bad batteries were measured good using the analog or even with a digital multimeter? The battery voltage drop the moment you connect it with a load. With the ESR meter, you don’t need to connect the battery to a load and you will know how good is the battery by just observing the ESR ohm test result. If you are not sure of the good ESR ohm value for a particular battery, you can always compare it with a good one or you can even draw up your own ESR meter chart for battery if you have the time. By the way, you could even draw up your own chart for the Non-polarized capacitor too.
Testing on Inductors/Coils
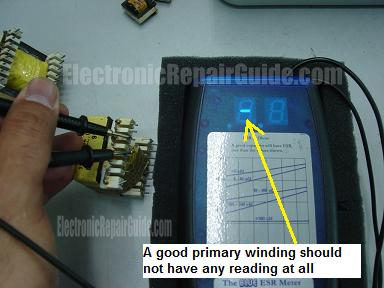
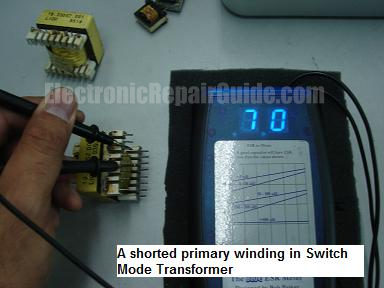
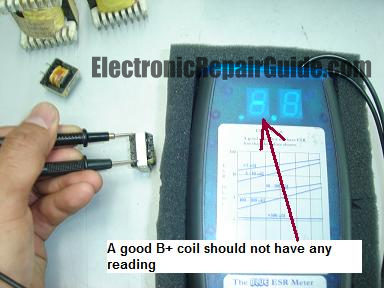
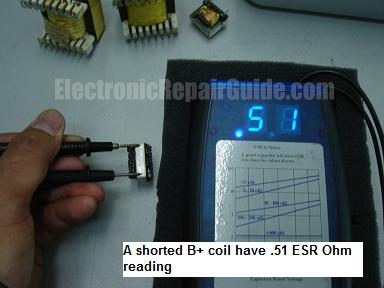
Now, you will be amazed too if this meter can be use to test a shorted coil like B+, Switch Mode Power Transformer and etc. I used the Blue ESR Meter to test some of the shorted coils and found that a good winding should not have any reading registered in the ESR meter while for a shorted coil will have a reading as shown in the picture. Of course there will be some limitation if compare with the Blue Ring Tester as I found that not all shorted turns could be measure by the Blue ESR meter. Reason? We all know that an inductor or coil have inductance reading and if the windings have complete short circuit (inductance value dropped to vey low) between windings you then can clearly see the result from the Blue ESR meter. However if the short circuit is partial only (Inductance value remains the same or slightly lower) then the Blue ESR meter can’t read it. This is where the Blue RING Tester comes into action. Blue Ring Tester could test for a complete and a partial short circuit between windings.
If you have some good and a bad coil for comparison, you can take out your Blue ESR meter to make the test but don’t hope all shorted coils must show a reading. In other words it depends on how severe is the short circuit between the windings as explained above.
Click Here To Purchase The Blue ESR Meter
Act as Short Locator
As mentioned in some websites that one can use the ESR meter as a short locator. So what does the short locator mean? It means that the meter can be use to trace a short circuit in the circuit line. Let’s put this as an example: you came across a Monitor that have power problem and you found that one of the output lines actually shorted to ground. That means by using an analog meter measured across the supply line and ground using X 1 Ohm range you found that it has reading in both ways. By right it should have only one high reading and one low reading. With the test result, you can conclude that along the supply line there has a component or some components that had shorted to cold ground. It could be a zener diode, transistor, small ceramic capacitor, IC and etc.
In order to trace where the source of the short circuit, you can use the Blue ESR meter or the Ohm meter to find out the shorted component. Since this article is about ESR meter, I will just describe how this ESR meter works to locate the short circuit.
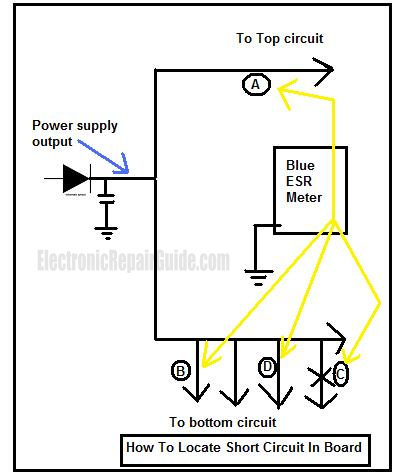
Place the ESR Meter black probe to ground and the yellow probe to the supply line. Slowly move forward according to the line and observe the readout from the ESR meter. Assuming the supply line has two branches (let’s put it as top and bottom circuit lines) to power up two different circuits and the problem is in the bottom line. If you move your probe to the top line (A) you will notice that the ESR meter readout Ohm reading is increasing and this indicates you are in the wrong track. Now reverse the probe and move to the bottom line and touch on all the solder pad along the line (B), (D) and (C). You will see that the ESR Meter readout will slowly decreasing and the lowest reading (say 0.01 ohm) is the short circuit area which is in the (C) area!
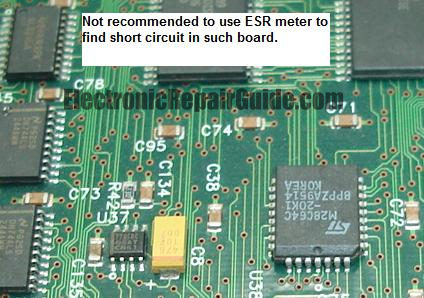
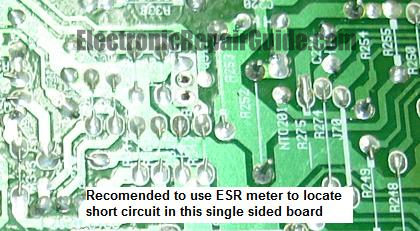
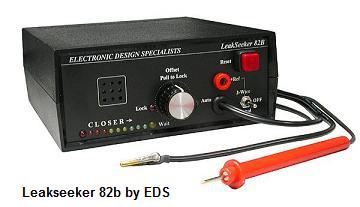
Well this method only can be applied to single sided board like TV, Monitor and etc. It is not recommended to boards that have lots of layers with tiny tracks like computer motherboard and etc as the meter is not sensitive enough to locate such problem. Imagine if the board has many small ceramic capacitors connected to ground and one of them had a short circuit, how do you know which one is actually shorted? You need the Leakseeker 82b from EDS to perform such tasks!
Well after explaining all the benefits of the ESR meter, I believe you would also want to know the disadvantages of this meter-am I right? No problem, I will share it with you.
Electrolytic Capacitors connected parallel
If there is a circuit that have two electrolytic capacitors connected in parallel then the reading that you are getting could be okay even though either one of the electrolytic capacitor had developed an open circuit. You could have missed the bad one and may end up can’t locate the fault in the electronic board. In order to solve this problem, if you see two e-caps connected to parallel in the circuit say in the power supply secondary filter circuit then you just desolder one e-cap pin and start to test the e-caps. With this way you will get a more precise reading. If both e-caps tested okay you then move on to test other e-caps. Isn’t that easy?
Electrolytic Capacitor connected parallel with a Low Ohm resistor
In Monitor, sometimes there will be one or two circuits that have the electrolytic capacitor connected parallel with a low ohm resistor. This will produce a very low ESR Ohm reading and an open circuit e-cap you may have thought that it was a good cap (because generally the lower Ohm result you get, the better the capacitor is). This is not a big problem, just desolder either the e-cap pin or the resistor pin and begin to test to get an accurate result.
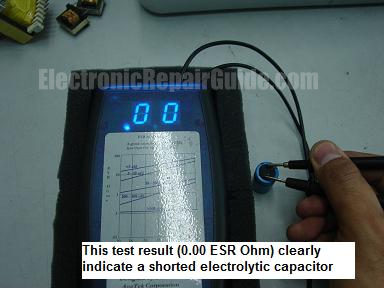
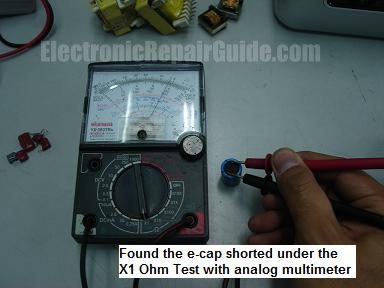
Shorted Capacitor
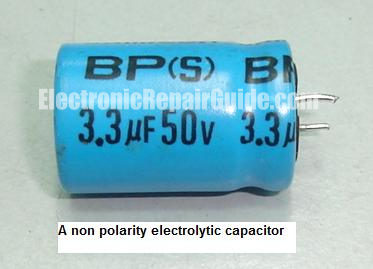
The Blue ESR Meter can be use to find out a shorted electrolytic capacitor too. Although a good e-cap generally has low ESR Ohm reading, the reading should not be in the 0.00 or 0.01 Ohm. That means if you come across an e-cap that have the reading of 0.00 or 0.01 Ohm which is too low to be true then you just remove the e-cap and test it with an analog Ohm meter set to X 1 Ohm range. If the pointer stay, tested either way with the meter and did not discharge then you have found a shorted e-cap. If you look at the picture, a good 3.3 Uf 50 volts non polar e-cap should have an ESR about 0.08 Ohm but a shorted one has 0.01 Ohm. I found this shorted e-cap in one of the 14” CRT Likom Monitor after confirmed it with the help of analog meter.
Note: This article test result was taken from using the Blue ESR meter or the Dick Smith ESR meter. Both meters were designed by Bob Parker from Australia. I can’t guarantee the test result if you are using other brand of ESR meter found in the market.
Conclusion- I have already explained the advantages and the disadvantages about ESR meter but from the article the advantages out weight the disadvantages. If you carefully study this article you could overcome the disadvantages easily. Being an electronic repairer that does not have this meter and never plan to invest one, I believe you will be missing out something good in your life. Give yourself a favor and invest one and you will get the investment back many many times ever! Do you know that there may be more advantages of using this meter but the advantages are yet to be discovered? I heard some use it as an audio signal source to locate problem in speakers and amplifiers too.
For those of you who already owned the Blue ESR meter or the Dick Smith ESR meter and does not know about the tips I just shared above, hope you will spend some of your time to test out the components like the non polarized capacitor, batteries and etc so that you will be familiarize and fully utilize of this amazing ESR meter. Blue ESR meter is more than just an ESR meter! Have a happy testing day and all the best to you!
Click HERE to Purchase the Blue ESR Meter
|
|


Copyright@ 2006-2014-www.ElectronicRepairGuide.com All Rights Reserved