Simple Ways On How To Test A Crystal With Tester Or Checker
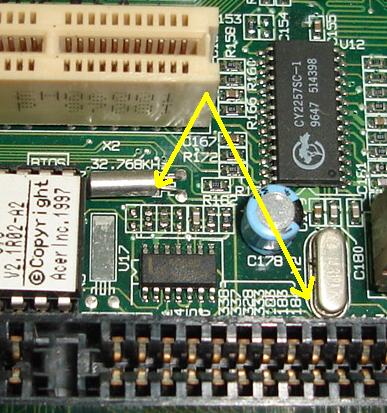
A Crystal and location marking
It’s simple on how to test a crystal with a tester or checker. Crystal oscillators are used to generate precise, stable radio frequencies and are found in a wide variety of electronic equipment such as Computers (motherboard and monitor), Television, Telecommunications systems (mobile phone), and etc. The function is to keep the frequency of the clock from drifting. If the signal from this clock stops producing frequency, or is weak, or the pulses begin to vary or change, the electronic equipments might show intermittent problems or might stop altogether.
Crystals in Computer Motherboard
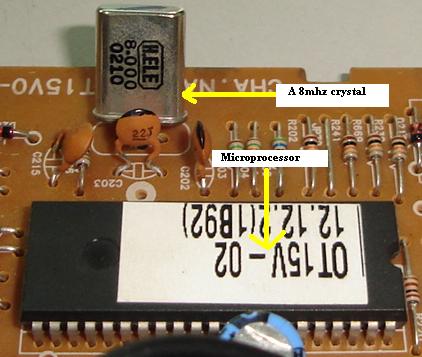
The microprocessor pins that hold the crystal oscillator are usually called OSC IN and OSC OUT and the frequency is marked on the crystal. The location of the crystals was labeled as XTAL or X. Some examples of crystal oscillator frequency are 4 mega hertz, 8 mhz, 16mhz and so on.
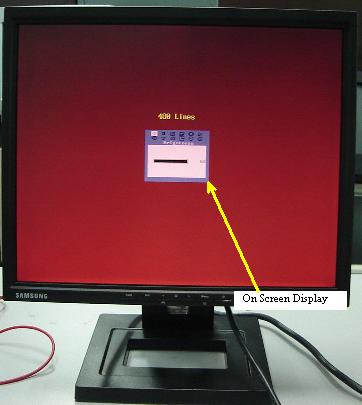
I’ve experienced quite a number of Computer Monitor crystal breakdowns causing the On Screen Display (OSD) to disappear from the screen. Some On Screen Display even missing half of the display and also erratic. Replacing only the crystal solve the OSD problem in Monitor. A loosen crystal connection in Computer Motherboard could cause the system to ‘hang’ after running for sometime.
Crystals are quite fragile components because of their construction and designed. Unlike a resistor or a capacitor, if you drop one on the ground from a decent height, it’s a 50-50 chances whether it will function again. Though crystal don’t become faulty easily like a resistor or capacitor, it is important for an electronic repairer to know how to test a crystal.
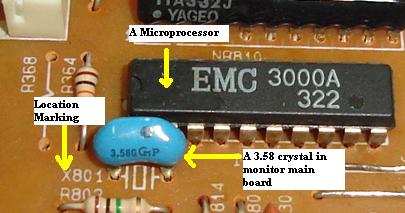
A Crystal and its location marking in a Computer Monitor
Testing the crystal is not a breeze either. You cannot just take out your trusty meter and test the crystal in it. In fact, there are three methods to test a crystal: -
Using an Oscilloscope- A crystal oscillator produces a sine wave when excited. It is appropriate then, to see a waveform representative of a sine wave on the clock pins. If the clock is not working properly, replace the crystal. Test the crystal with power on. Normally microprocessors are usually very reliable but not in this case of a Compaq MV720 Monitor. Monitor came in with no high voltage symptom. Using the scope to check on the crystal revealed very unstable waveform and replacing the microprocessor solved the no high voltage problem and the crystal waveform shown a perfect sine wave.
A crystal oscillator sinewave
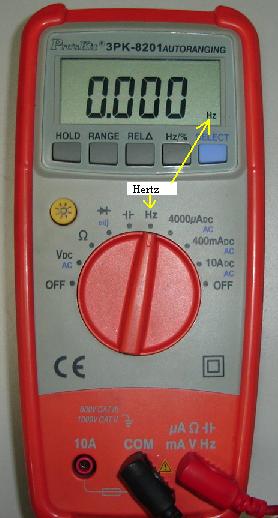
Second method is to use frequency counter to check the frequency of the crystal oscillator. The measurement must be taken when the equipment power is ‘On’. Put the probe of the meter or frequency counter to the crystal pin and read the measurement. Make sure your frequency counter meter has the range that is higher than the crystal frequency you are checking.
If the crystal is 8 mhz then your meter should have the range to be able to check that frequency. Assuming the readout of the crystal is 2.5 mhz then you know that the crystal is not functioning well and need to be replace. Normal digital multimeter usually has a small range for checking frequency. However the digital meter (Greenlee brand) that I’m using is able to measure up to 24 mhz. You can read the specification of your meter manual and see how high is the range is.
Frequency counter in a digital multimeter
A Crystal oscillator and microprocessor (cpu) on a mainboard
Third method is to use a Crystal Checker- With this way; normally the crystal is placed in the feedback network of a transistor oscillator. If it oscillates and the LED is lightening up, this means that the crystal is functioning. If the crystal doesn’t work, the LED will goes off. Instead of using LED as indicator, some other expensive crystal checker uses a panel meter to indicate if the crystal is functioning or not. If you search crystal information on the internet, you will find some websites that provides tips on how to test crystal as well as how to build one.
|
|
Copyright@ 2006-2014-www.ElectronicRepairGuide.com All Rights Reserved

