|
Be Alert Of The Surrounding Components In Electronic Circuit
Ever wondered why sometimes you can’t solve an electronic circuit problem? You had spent many hours trying to find or locate possible cause in the electronic equipment you are repairing but at the end you still can’t find out the cause? You scratched your head and trying to figure out what went wrong with the equipment. In your mind, you said this to yourself “It can’t be as I’m very familiar with the electronic equipment circuit and there’s no way I can’t solve/repair it. I had come across this problem many times and almost all the time I could tackle the fault”.
You never give up and keep on finding the fault until you had loose out more precious time where you can actually use that time to repair other equipment. This scenario mainly happens to electronic equipment that had been repair before by some other people. It could be a junior tech or someone that have very little experience in electronic repair.
Whenever we are in the electronic repairing business, we have a duty to pick up equipment and repair the unit and after that we will send the equipment back to the customer. Again it depends on how we run the electronic repair business. As for my company, I would assign my colleague to go to computer shops/dealers to pick up Monitors and Printers for repair. After the repair work was done we would send the equipment back. If you are running your repair business as Authorised Service Centre/Provider, your customers may send the equipment to you for repair for that particular brand-that’s the advantage of being an Authorized Service Provider (saving time and cost). However, in certain cases you may also have to go out to get the bad equipment for repair even though your company is running as the Authorized Service Centre.
At the customer place we can’t distinguish from outside whether the equipment actually had been “touch” before by other technicians or not. We just have to pick it up and put it into the van. The only way to find out whether the equipment had been touch before by anyone is to open up the cover and look at the soldering joints. If you could see fresh soldering joints in certain area and sometimes the whole area of the circuit board, you can conclude that it has been touch up by someone before. In this case you have to be careful as we do not know what the previous tech had done to the equipment! Now this article is to explain to you and show you how one have to be alert of the surrounding components when doing the repair work which had previously done by other technician so that you will no longer losing your precious repair time again! Let’s begin!
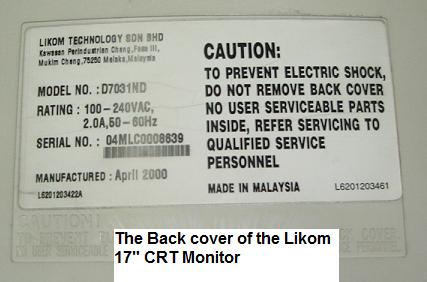
This LIKOM 17” CRT Monitor came in with the complaint of no power. After spending sometime on the power side I found that the secondary diode had shorted and along the same line one filter capacitor had bulged. With the replacement of the new ultra fast recovery diode and the filter capacitor I thought everything will goes well but I was wrong because although the Monitor have power and display the picture now had a wide screen i.e. Horizontal size problem. That means you can’t get the picture into the original position (normal size) even though you have adjusted the horizontal size control to minimum.
I took this case as normal because in electronics, many things could happen. In other words, a power failure may cause secondary problem and etc. So now my concentration was in the horizontal size area/circuit. For your information there were fresh solder marks all over the horizontal size area and the power section. I began to test the voltage and the signal in that circuit and it looked very abnormal! I believe also that sometimes a component can breakdown when under full load. Due to that I directly replaced one by one the component in the horizontal size circuit and I still could not find out the cause. Dry joints, bad modulation diode, shorted pincushion transistor and open circuit in the non polarity electrolytic capacitor were the common cause of the horizontal size problem. Normally, for a horizontal size problem, I could easily solve the problem fast but this time it took me longer hour!
After the failure of detecting the fault I sat down for a while and thinking what could be wrong with the Monitor. Later the “A-Ha” moment came pop up in my mind and suggested to me to look for any wrong components substitution. Since there was a fresh solder marked before I tested on the horizontal circuit, chances that there would be someone had misreplaced with an original component! I began to search again and carefully look at each of the component in the horizontal size. I saw the modulation diode part number was a bit weird (P600G). At the beginning I thought it was SUJ30 which is the exact part number for a modulation diode as I didn’t suspect that the part number was P600G. I was fooled by the same size of the diode!
I checked the P600G diode specification from the internet and found that it was rated 400 V which is far below to be use as modulation diode. A modulation diode should have at least 600 V and above. Next, I took out a replacement diode 31DF6 and fitted in back to the circuit. Guess what? The picture came out perfectly normal and I could adjust the horizontal size again. The previous technician may have detected the cause of the horizontal size problem but he may also have thought that bigger size diode is better for replacement or he may not have the experience of reading a diode’s data. Later he could have put back the shorted diode and filter capacitor back to its original position at the power side when he knew that he could not solve the horizontal size problem. You can also use the UF5408 ultra fast recovery diode as replacement too.
| |||||
|
Copyright@ 2006-2014-www.ElectronicRepairGuide.com All Rights Reserved


