How To Solve No Power Problem in Fuji Xerox Laser Printer Model Docuprint 203A
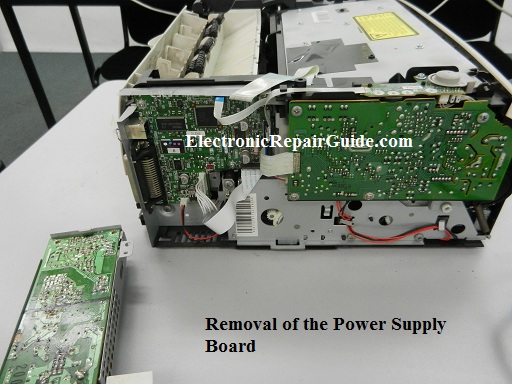
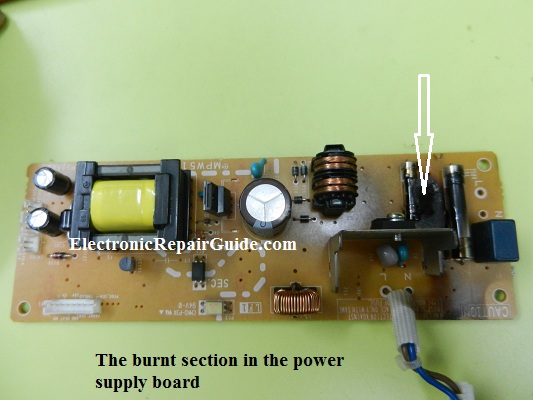
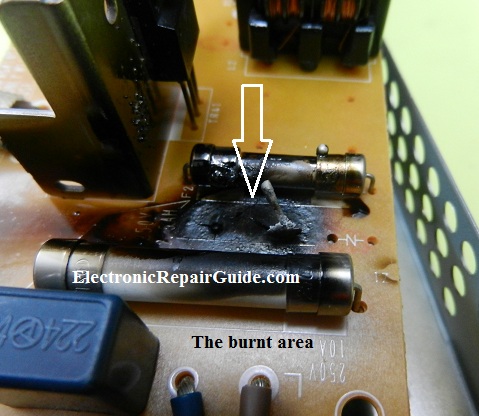
No power was the complaint of this printer. For your information, my partner Mr William is the one who repair printer in our workshop. He will only solve printer mechanical, fuser and replacement of boards. If he encounters any problem with the electronics section he will pass to me. It took him about 5 minutes to dismantle the printer covers and to remove the power module. He passed the power supply board to me and I saw a burnt mark at the primary input side. The smell from the burnt circuit board was terrible.
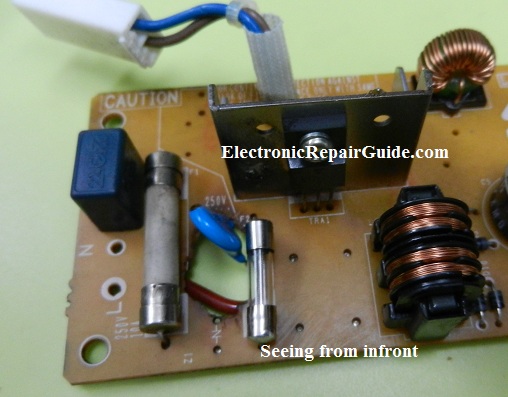
The ac input side has 2 fuses- one for the main power supply and the other for the fuser side. It was the main fuse (2.5 amp slow blow) that had open circuit but the other fuse was still good. I first removed the fuse and the burnt part.
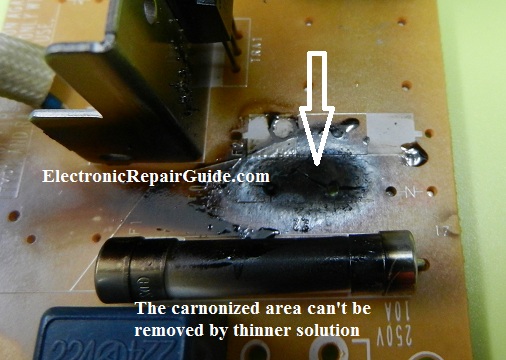
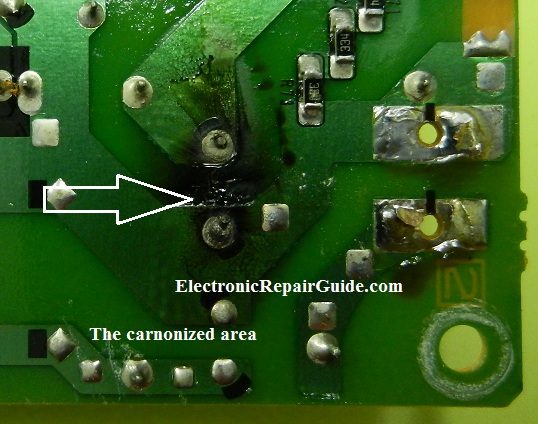
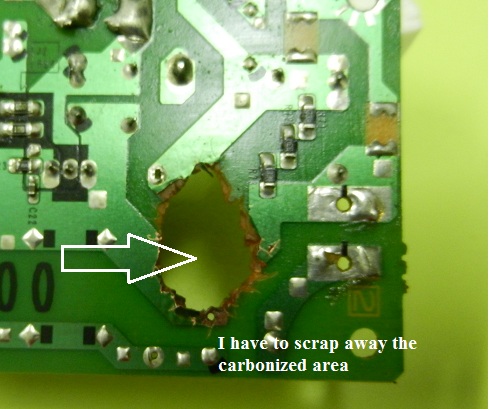
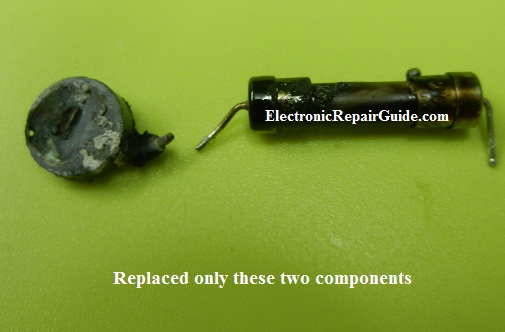
The burnt part was a Varistor and the part number cannot be seen. I then used thinner solution to clean the board but the carbonized area can’t be removed due to the severe burning of the Varistor. I knew if I did not remove the burnt section there might be a chance that it will be conductive. I took out a small cutter and began to cut out the dark section and some of the burnt circuit track located behind the board. It caused a small hole but I do not have choice.
The next step was to check if other components were affected or not. I have checked the secondary diode, power FET, power transformer, 2 X Optoisolator ic and bridge rectifier and were tested good. I concluded that it was just the main fuse and the Varistor have problem.
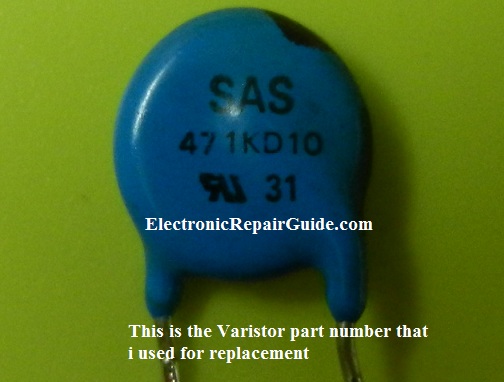
Getting the main fuse is not a problem but finding the right Varistor could be a headache. The reason for it was because there were no part number due to the Varistor burnt beyond recognition. The only way to solve this problem is to get another Varistor from another junk printer board. The Varistor is connected between the Live and Neutral line.
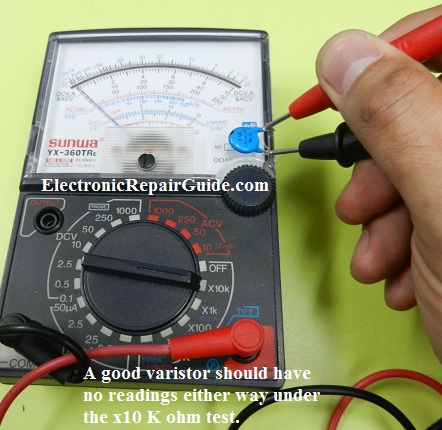
A good Varistor should have no reading when check it with an analogue meter set to X 10 K ohm. If there is readings either way then the Varistor is considered shorted. In fact if I don’t put the Varistor the power supply will still work except that it has no more protection against excessive transient voltages.
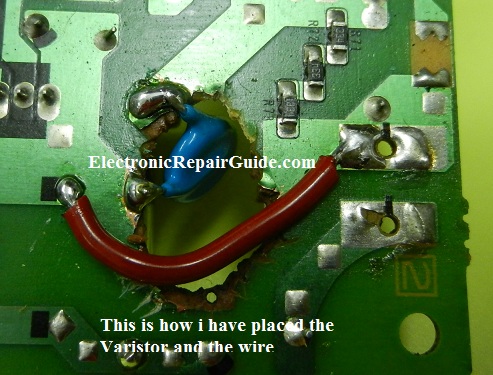
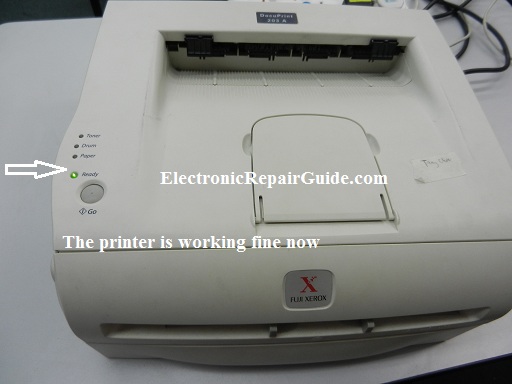
After cleaning the board, replaced the main fuse and Varistor and solder a wire across two connections as seen from the photo below the printer worked perfectly good.
Conclusion- This kind of no power symptom can happen to any equipment that have the Varistor. Some could have one, two or even three Varistors. Do not always think that when something burnt the equipment surely can’t be repaired. It can be some minor problem as you have read from the article above. Do your best first and if it really can’t be repaired then move on to another unit.
Click here to learn how you can become a Professional in Switch Mode Power Supply Repair
Click Here To Learn DVD Player Repair By Humphrey
Click Here To Learn How To Repair LCD Monitors With the Help Of 10 True Repair Case Histories
Click Here To Learn LCD TV Repair Tips by Kent Liew
Click Here To Learn Laptop Motherboard Repair
Click here to learn how you can become a Professional in Testing Electronic Components
Click here to learn how you can find burnt resistor value
Click here to Get 24 Best Electronics Repair Articles
Click here to learn how you can become a Professional in LCD Monitor Repair
Click here to learn how to repair Plasma Television By Damon
Recommended Basic Electronics ebook By Greg S Carpenter Recommended Mr Steve Cherubino Laptop Repair Videos For Beginners!
Recommended Mr Kent LCD TV Repair Membership website-Visit Now!
Recommended Mr Kent Plasma TV Repair Membership website-Visit Now!
Recommended Print Head Repair Guide By William Hor
Recommended Mr Kent Projection Television Repair Membership website-Visit Now!
Recommended CRT TV Repair ebook by Humphrey Kimathi
Recommended Computer Repair Course
Click Here To Learn LCD TV Repair
Click here to learn LCD TV Repair Case Histories
Click here to learn PS3 repair
Click Here to repair and speed up your PC
|
|
Copyright@ 2006-2014-www.ElectronicRepairGuide.com All Rights Reserved
