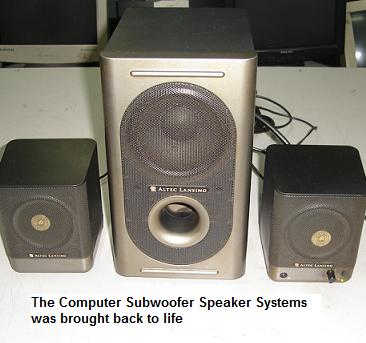
How to Repair No Power Problem In Computer Subwoofer Speaker SystemMy friend brought in this Altec Lancing Computer Subwoofer Speaker System for me to repair and the complain was no power. This speaker is rather expensive when he bought it last time and due to this he wanted it to be repaired! He doesn’t mind paying for the repair bill as long as he wanted the set back working again. He loved the sound produced especially when playing computer games. Before I start, I would like to share with you a real experience that I came across many years back. I had a friend whose Television have problem and it was a very old set. The repair bill was so high that he had no problem of paying it. He actually can add in just a little more to buy a new set.
I asked him why you still want to repair the old television even though the repair bill was so high and that he could actually opt to get a new one by just add in some extra? He answered “Well Jestine, the TV had been with me for such a long time and I used to seeing it that way everyday and it’s like there was a relationship!” Of course it was not about the love relationship, it was a routine or pattern that had set in his mind so that he could view it comfortably. I do not know about you but indeed there were such people like this. It was not wrong because everyone have their own way of thinking and opinions. So in the future, please don’t be surprise after the CRT Monitor or TV that already went obsolete and yet people still want them to be repaired!
As usual, I will try power up the set first before dismantle the unit and start troubleshooting. Sometimes it could be the customer error of not plugging in the power cable correctly to the AC output socket. Yes, it was confirmed no power and I started to remove the circuit board. The first thing I see was the fuse and it looked okay. Now please don’t be deceived by the outlook of the fuse. In fact you got to test it with multimeter because I came across fuses that have a very tiny break and you thought it was okay. The reading from the multimeter will tell you if the fuse is good or bad. I tested it to be good and moved on to see if there are any dry joints or burnt components in it.
I don’t suspect a shorted bridge rectifier diode because if either one of the diode shorted it would definitely had caused the fuse to blow! I don’t discharge the filter capacitor either because it was rated at only 25 Volt! Since it was rated at 25 volt, this means the voltage across the capacitor must be less than 25 Volts-most probably from 16 to 20 Volts! Be careful about the rating of the filter capacitor, if it rated higher than 50 volts then please discharge it before you begin to work on the unit. If you don’t feel good about this, then just directly discharge the capacitor regardless of the rating of the capacitor voltage.
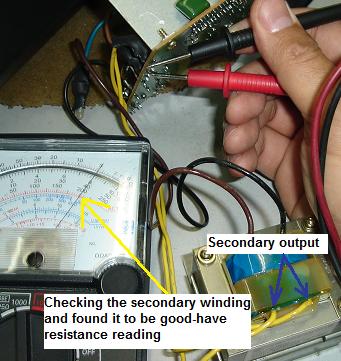
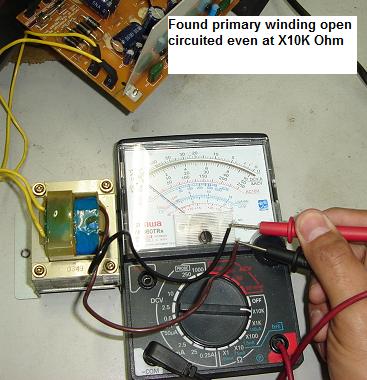
Since there were no dry joints, loose connection or even burnt components (the board looks very clean!) the next step that I took was to power “On” the set and perform voltage testing. Okay the power cable was connected to the AC outlet and the power On/Off switch was pressed. Before that please make sure the circuit board is not touching on any of the metal/conductor underneath the speaker systems. Isolate it properly and once everything found to be okay then power “On” the set. I used my digital multimeter to test on the output of the linear transformer. Surprisingly there was no output measured at the secondary side. I used my analog meter to check on the windings of the linear transformer. I used the resistance test on both the primary and the secondary windings and found that the primary winding had an open circuit. By right it should have some resistance reading!
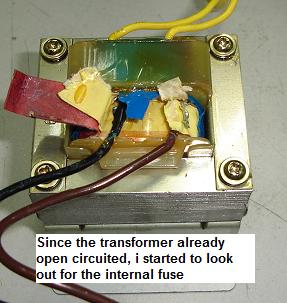
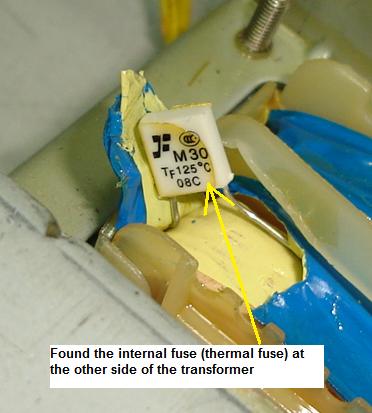
I removed the whole transformer and began to inspect to see if there is any fuse in it. For your information, some transformers have a built in fuse for protection purposes. After peeling off some of the insulation tape from the transformer I saw a rectangular/square white component in it. Upon close inspection, it was a thermal fuse/ thermal cutoffs and written as M30 TF125 degree Celsius 08C. You may ask “Why there is a thermal fuse inside the transformer?” The reason for it is simple-to prevent damage from overheating in electrical products. Do you know that the subwoofer cabinet was made from wood? So if the transformer overheated, the fuse will open circuit and stop the transformer from burning the cabinet thus preventing any fire that could happen!
This type of fuse comes in different designs such as Axial, Radial or even Surface Mount styles. Many appliances actually do use this kind of fuse such as irons, cookers, hair dryers, toaster ovens, stoves, water distiller, microwave ovens and even electric blanket! How does this fuse function and made? The active component of a thermal fuse is a fusible alloy surrounded by a special resin. Under normal operating temperatures the fusible alloy joins the two lead wires within the body of the cutoff. When the preset temperature of the cutoff is reached, the fusible alloy melts and with the aid of the special resin, complete cutoff is ensured!
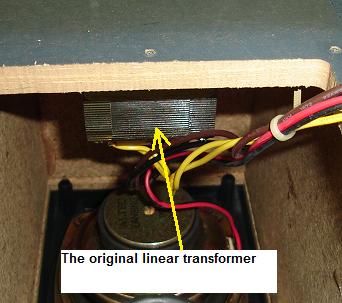
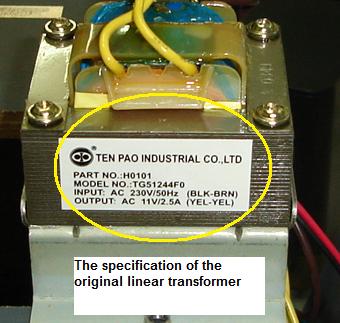
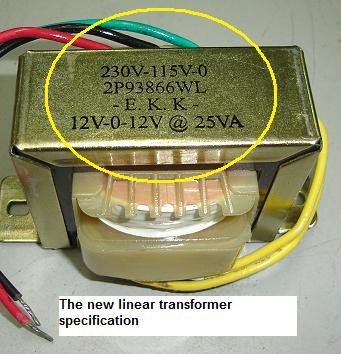
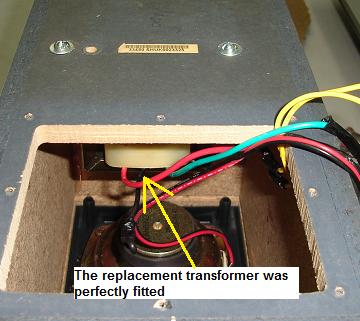
Next, you can replace the thermal fuse and let it run again or change the transformer. I have decided to replace the transformer because the manufacturer put the thermal fuse in it for a purpose. Now the fuse already open circuited and this could possible indicates the insulation inside the transformer might still be damaged. The rating of the original transformer was 11VAC 2.5 AMP and since I could not get the exact transformer I used a slightly higher spec which is easily found in the market-I bought the 12 VAC output with 3 AMP!
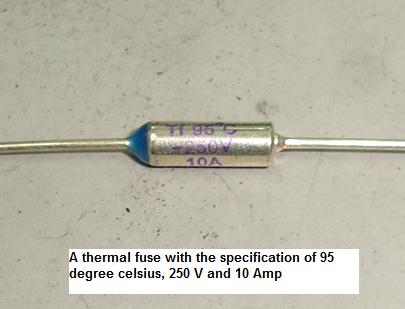
There is no problem in getting the linear transformer from the market but it was quite hard to get the original thermal fuse. Due to this I used the normal axial thermal fuse that have the rating of 95 degree Celsius, 250 V with 10 Ampere. Actually I got a choice whether to use the same or lower rating than original but because I have one in my spare part compartment I have chosen the lower rating one! Current is not so important as long as it is greater than normal operation. Temperature rating is the one that we are concerning about. Please don’t replace the thermal fuse with a higher temperature rating than the original one.
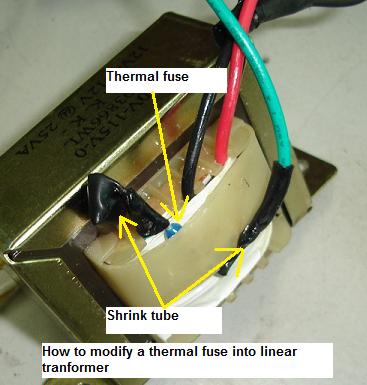
Now the hardest thing to do is to think of a way how to make sure that the thermal fuse body have a contact with the windings like where and how I found it. The thermal fuse is meant to open when the windings get hot and not to detect the temperature in the speaker cabinet! After spending sometime, I managed to slot in the thermal fuse into the new transformer and made contact with the insulated windings. Then I used the shrink tube to cover the soldering joints of the input AC wire as seen from the photo below.
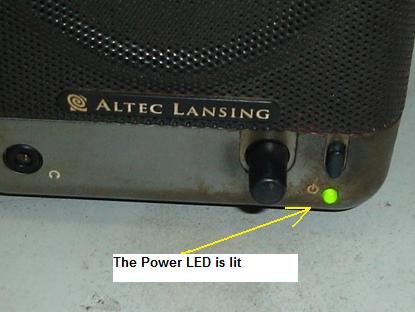
Once everything has completed I power “On” the set and could see the power LED lit. Then I placed the speaker besides my office computer and tested the sound. It was great and superb and without any distortion! After run for couple of hours, I switched the power Off and touch the newly installed transformer to check if it hot or not. Guess what, it was slightly warm where we considered it as normal operation. I returned the set back to my friend and get him to test it out. After couples of weeks I met him again and asked about the set and he told me it was fantastic!
By the way this computer subwoofer speaker system used only couples of main components like the BA5417 is a 6 to 15V-compatible dual power amplifier IC, TA8229k is an audio power IC with built-in two channels, A 7809 Voltage regulator and a big filter capacitor 6800 uf 25 V. Hope you have enjoyed the repair article. Have a brilliant and a wonderful day!
| ||||
|
Copyright@ 2006-2014-www.ElectronicRepairGuide.com All Rights Reserved
