For ERG Members OnlyHow To Repair Sharp LCD LL-T15G2 Power Adapter.
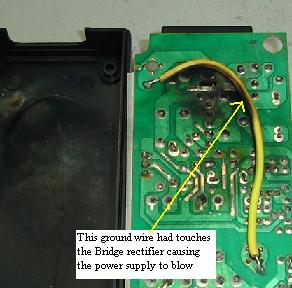
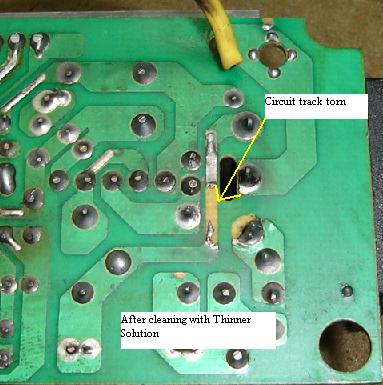
The customer complaint of this Sharp LCD LL-T15G2 LCD Monitor was no power in the power adapter and LCD screen. The moment I opened up the casing I saw the internal cover and the power supply board had burnt mark on it. First I thought it was hit by lightning but upon carefully inspect the board I found that the yellow wire was touching one of the bridge rectifier diodes pin. You could also clearly see that one part of the track had broken. Surprisingly the fuse didn’t open circuit!
The darken board have to be clean with Thinner solution before I begin starting to check on the suspected components. First make sure the filter capacitor have no voltage checked with the help of your voltmeter, if there is voltage you can discharge it with a 2.2 k ohm 10 watt resistor place across the capacitor leads. This is just a normal procedure as I don’t want any of my readers who are new in this field to get discharge through his body from the capacitor charge.
Once i have confirmed that there are no more voltage in the filter capacitor, I will then use my analog meter set to x1 ohms to test on the power fet (part number is 2sk3114). Place the black probe to the center pin of power Fet and the red probe to the other two pins one at a time. The meter should not register any reading, if there are readings; it could be the power fet have shorted. In order to confirm it the best way is to remove the fet from circuit and check it. If the power FET didn't blow, chances is very high the pulse width modulation IC (PWM) KA3842B is good. The resistors in the primary side checked to be okay too.
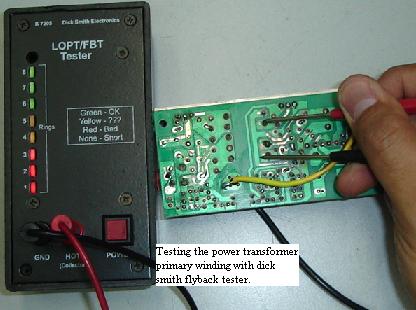
After this test I will use the Dick Smith flyback tester to place across the power transformer primary winding to see if the winding is shorted or not. The readout was 8 full bars and this proves that not only the primary winding is okay, the secondary diodes as well. With this meter, I can say that it truly save my troubleshooting time. If either the primary winding or the secondary diode shorted, the meter readout would drop to very low or totally goes off.
Now, I would just scan all the electrolytic capacitors with my ESR meter although I knew that the chances for the capacitors to go bad is very slim due to the problem was short circuit between the yellow wire and one of the bridge diodes and it definetely would not affect the capacitors.
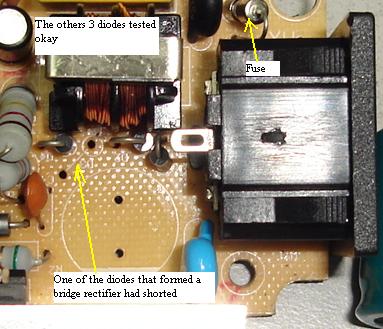
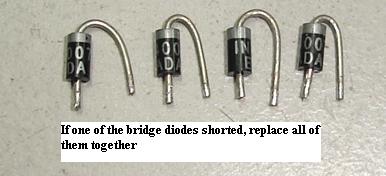
Okay coming back to the bridge diodes, one can always check the diodes while it still on boards with your analog meter set to x1 ohm. It should not register two similar readings. If you are not sure about the reading you can always compare with the other diodes. Checking the diodes on board I found one to be defective and I removed all of them and replaced with 4 new 1N4007 diodes. For your information, if one of the diodes shorted or opens circuit, one has to replace the other 3 diodes as well.
I do not know about you, but from my years of electronic repair experienced, I do came across problem where after sending back the equipment (after replacing one of the bridge diodes), few days or weeks later the same customer came back with the same problem i.e.; no power (caused by another shorted diode in the bridge circuit). For reliability reason and to prevent the customer from sending back the equipment for warranty claim, the best is to replace all of them if found one diode to be faulty. This diode is not expensive compare to the time loss and it may affect your reputation too as an electronic repairer.
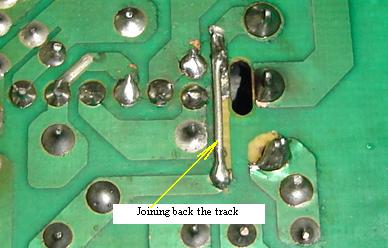
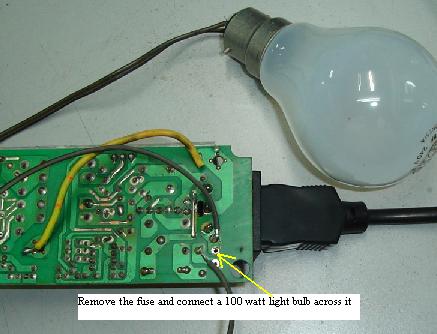
After the replacement of the new diodes, you need to join back the broken track with the help of a lead cut from a 2 watt resistor. Before you switch on the power supply, one must always connect a 100 watt light bulb to test. The reason for using the light bulb is to prevent the power supply components that you have just replaced to blow again just incase if there is short circuit somewhere in the power supply that you have missed to check.
Simply remove the fuse and connect the two wires of the light bulb across it. Now switch on the power supply and observe the light bulb. If the bulb lit brightly and stays there for a long time, this means that there are still problems in the power supply. If the bulb didn’t lit, you can now put your probe at the output to check for the presence of 12 volt.
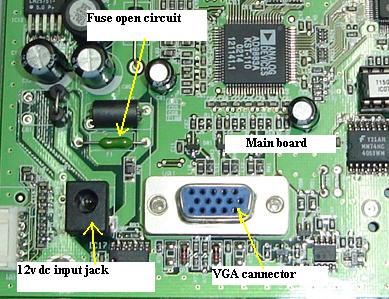
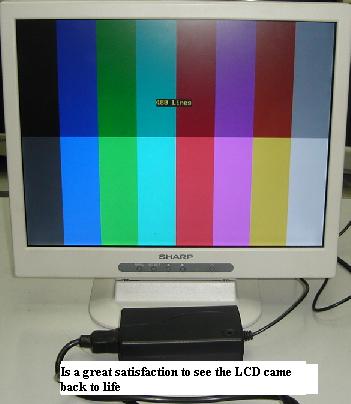
Once you get the output, you can put back the fuse and close back the cover. When I plug the 12 volt jack to the LCD Monitor, there was no power. I presumed the short circuit in the power pack/adapter may cause the LCD internal fuse to blow as well. True enough, after opening up the LCD cover and check on the fuse, it found to be open circuit. Solving the internal fuse and the power supply put the Sharp LCD Monitor back to life again. Not only you gained the satisfaction from repairing the power supply, you get paid also from your customers too! That’s all for it, take care my friend.
|
|
Copyright@ 2006-2014-www.ElectronicRepairGuide.com All Rights Reserved

