|
How To Easily Build Your Own FET Tester
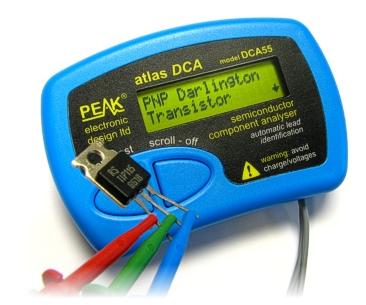
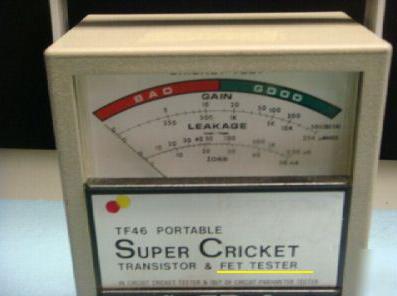
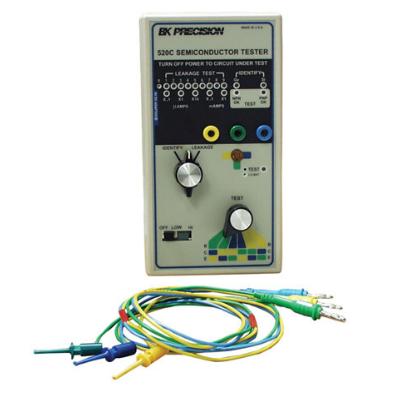
There is no doubt that nowadays we are seeing more FETs being used in the electronic equipment. FETs can be found in the power section, LCD inverter, UPS, Amplifier, Monitor B+ and S-correction circuit, ATX power supplies and etc. When this component fails, one has to use a meter to test it to check if it is good, shorted, open or leaky. The meters can be a normal multimeter, specialize FET tester like the Peak Atlas Tester, Sencore Cricket Tester, B & K transistor tester and etc. The specialize testers are expensive and most of it could helps you to automatically identify the pins of the FET (gate, drain or source). If you use a normal multimeter, you have to identify the pins on your own. Assuming if you do not know the pin out of the FET, you can always check from the data book or even from the internet. If you want more information about FETs, you can click HERE to visit Wikipedia website.
Typical example of specialize transistor tester
Okay, this month newsletter is about building your own FET tester and this article was contributed by Mr Behzad.
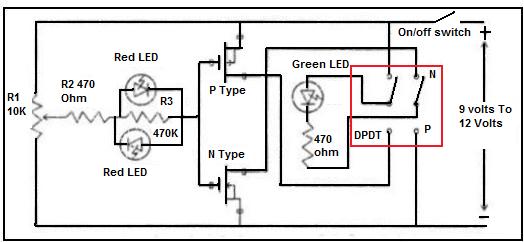
FET Tester Schematic Diagram
This is a simple and easy to build FET tester. It can test N-CHANNEL and P-CHANNEL FET. These are the following components that you need:
1) 2 pcs of red color LED 2) 1pc of green color LED
3) 1pc of DPDT switch (DPDT stands for Double Pole, Double Throw)
4) 1 pc of On/off switch
5) 1 potentiometer 10k ohms
6) 2pcs of resistor 470 ohms 1/4 watt
7) 1pc of resistor 470 K ohms 1/4 watt
8) 2 IC sockets- 8 pins dip
9) 1 small pc of project/circuit board
10) 1 pc of knob for the potentiometer
11) 1 Project box
12) 1 pc of 9 volt battery
13) 1 pc of 9 volt battery holder/connector
The IC sockets are good for holding the FET during testing time. We use just three pins of each socket for the Gate (G), Drain (D) and Source (S). One socket is for N-CHANNEL FET and the other one for P-CHANNEL FET. The DPDT switch is good for changing the mode of tester from testing N to P-CHANNEL FET. Another advantage of this tester is that if you have been using multimeter to test on FETs, you will find that our hands is too big for the small FET pins (TO- 92 Case). Thus by inserting the small FETs into the IC socket, you will eliminate the error of one finger touching on another pin during testing time using the multimeter.
Test Result
If the FET is shorted one of the red LED will lit. In order to confirm that the FET under test is good even if you increase the potentiometer to maximum the red LED should not lit otherwise the FET is bad or leaky. For a good FET the green LED will light up.
Thank you
Behzad
==============
Conclusion- According to Behzad, the meter was easy to build and the cost was very cheap too. If you have the time, try build one and see how useful this tester is. This tester diagram was provided by Zed Pato and Mr Behzad from Iran who had assembled it. Zed Pato is from the Philippines and he is a electronic repairer and you could visit his blog by clicking HERE.
Note: If you are a electronic repairer or hobbyist and wish to publish your electronics article for the monthly repair newsletter you are welcome to email me.
Click here to learn how you can become a Professional in Switch Mode Power Supply Repair
Click here to learn how you can become a Professional in Testing Electronic Components
Click here to learn how you can become a Professional in LCD Monitor Repair
Click here to learn how you can find burnt resisto value
Click Here to Get 24 Best Electronics Repair Articles
Recommendation:
Recommended Mr Steve Cherubino Laptop Repair Videos For Beginners!
Recommended Mr Kent Projection Television Repair Membership website-Visit Now!
Recommended Mr Kent LCD TV Repair Membership website-Visit Now!
Recommended Mr Kent Plasma TV Repair Membership website-Visit Now!
|
|
Copyright@ 2006-2014-www.ElectronicRepairGuide.com All Rights Reserved


