How To Speed Up Of Testing Electronic Components-Part II
This is the second part on how to speed up checking electronic components. Flyback transformer-well I guess most of you all that deals with either TV or Monitor repair has came across flyback transformer in the circuit. Whenever a flyback transformer have problems it would cause power to cycle, high voltage shut down, no power, low power, arcing, blur, too bright and etc.
Now if you want to check if the flyback transformer is okay or not your first step is to check the internal capacitor with a digital capacitance meter. It should have reading about 1.5 – 3 nano farad measuring from the anode to the internal capacitor pin beneath the Monitor flyback. Besides using digital capacitance meter to measure the internal capacitor, you should also must use an analog meter set to X10 Kohm range to test it.
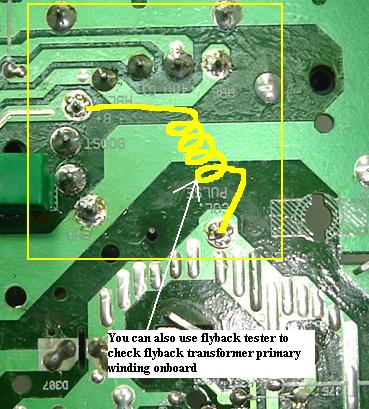
There would be no reading either way and if you got any readings then this proof that the internal capacitor had developed a short circuit. If the reading is okay then you can proceed to check the primary winding of the flyback. The primary winding pins are the HOT collector pulse and the B+ voltage in. You should check it on board with a Dick smith flyback tester or with any flyback tester that you have. If you are using the dick smith flyback tester, it should show at least 4 or 5 bars and above. If the tester only shows 1, 2 or zero bars then suspect something has gone wrong with the circuit.
Remember, a shorted diode in the flyback secondary side like the G1 or any other supply lines could pulled down the reading in the dick smith flyback tester. For your information, please don’t check the primary winding with an ohm meter (whether it is an analog or digital meter) because normal meters just can’t detect shorted winding in the flyback. Even if there is only one shorted winding, by using a flyback tester, you can easily find out the faults. A shorted horizontal output transistor (HOT), horizontal yoke coil, B+ circuit components, damper diode, safety capacitor may also caused the flyback tester reading to drop. Just practice more on this circuit with the flyback tester on different type of monitor so that it would be easy for you to solve problems that are related to flyback transformer.
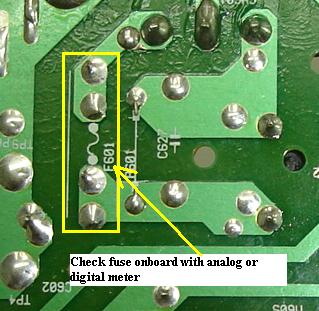
Next is the fuse, you can easily check it on board with your multimeter. Just set your meter either to ohms or continuity. A good fuse should have reading (ohms value) and beep sound if you select the continuity test. If no reading or sound, 100 % the fuse is open and need replacement. Replace only with the same ampere and voltage rating of fuse.
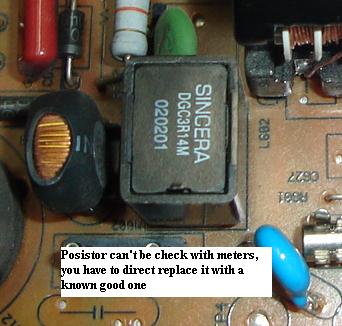
All Monitors and TV have a posistor used to degauss (demagnetize) the picture tube. Normally, the whole degauss circuit consists only the degauss coil, posistor and a relay (for auto degauss). The posistor may have 2 or even 3 leads. You can’t check the value of the posistor with multimeter. You have to direct replace it if you suspect it to blow the fuse every time when the equipment is turn “On” and the bridge rectifier is tested okay. Sometimes you can remove the posistor and “shake” it to check if you could hear any sound in it. If yes, then most probably something has loosened inside and need to be replaced.
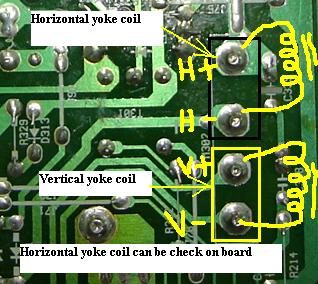
Monitors horizontal yoke coil can be easily check with flyback tester too. You can even check it on board and if the flyback tester shows 1, 2 or zero bars suspect a defective yoke coil. In order to confirm it, you have to lift up the yoke coils connector and directly measure it. If it still shows the same result, then most probably the horizontal yoke coil had developed a short circuit between the internal windings. Please do not check with an ohmmeter or even with an inductance meter as both don’t give accurate result when checking horizontal yoke coil.
Vertical yoke coil can’t be test with flyback tester and the good news is that the winding rarely give problem. You should check it with an ohm meter to determine the ohms value. If you have the expensive Sencore tester, you can always check the vertical yoke coil for any short circuit between the vertical windings.
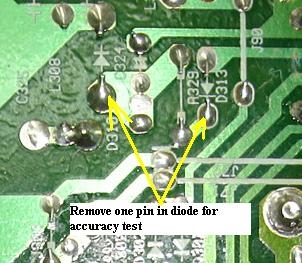
In order to accurately check diodes, you need to desolder one lead and test it with an analog meter set to X 10k ohms range. A good diode should have only one reading while the bad one will have two readings. Be careful if you want to test a schottky diodes as schottky diodes will have two readings but not shorted readings. If you get two similar readings then the schottky diodes is considered bad. You need semiconductor data book to help you to determine if the diode belongs to which family (general purpose, ultra fast recovery, damper, schottky diodes or etc). However, if you set your meter to X 1 ohm and test a diode on board and if you get two similar readings then chances are high the diode have shorted. In order to confirm it you still need to remove one of the lead from circuit. Assuming when an equipment came in with a blown fuse (fuse became dark), this sign shows that the equipment might have a major short circuit somewhere in the circuit (mainly power supply area). Using your analog meter set to X 1 ohms to check on the bridge rectifier on board you can easily tell if the any of the bridge diodes have shorted. Compare reading with a known good equipment and I’m sure you will understand about checking diodes on board.
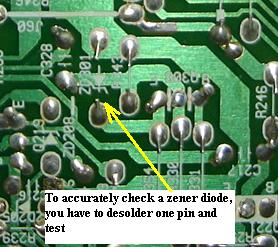
Checking zener diodes, you have to remove one lead from the board. Before you check on any zener diodes, you first need to identify what is the voltage of the zener diodes. Refer to semiconductor data book for any codes printed on the body of zener diodes. Once you know the zener diode voltage, by using again analog meter set to X 10 K ohm range, you will quickly determine if the zener diode is faulty or not. Any zener diodes from 2.4 volt to 12 volt should have two readings but not shorted readings and any zener diodes that have 13 volt and above should have one reading. You can check also zener diode on board if only the zener diode developed a direct short circuit which is easily measured with an analog meter set to X 1 ohm range. Remember to replace zener diode only with the same voltage and for the wattage, it can be the same or a little bit higher.
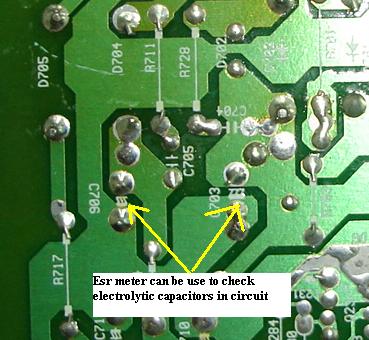
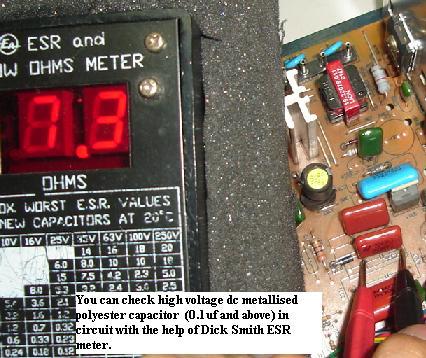
There are two different ways to test capacitors. One for the electrolytic capacitor and the other one for the non-polar or the ceramic type capacitor that do not have polarity. I will start explaining the electrolytic capacitor first. I believe many of you already own the ESR meter for testing electrolytic capacitor on board. There are many types of ESR meters in the market nowadays. Brand name such as the famous Dick Smith ESR meter, EDS Capanalyzer 88a, Tenma, B& K Precision, Cap Wizard, Peak Electronics and etc. No matter what ESR meter you use, the result you get will be the same which is checking the ESR Ohm of the electrolytic capacitor while it still on board. We all knew that it is quite accurate to measure e-caps while it still in circuit but do you know that ESR meter can’t test e-caps on all type of circuit? I’m not frightening you or make you to lost confidence in using ESR meter. I myself also use ESR meter to check for bad e-caps everyday. I just can’t part it away with this ESR meter. Without one I will have a hard way to find the defective E-caps.
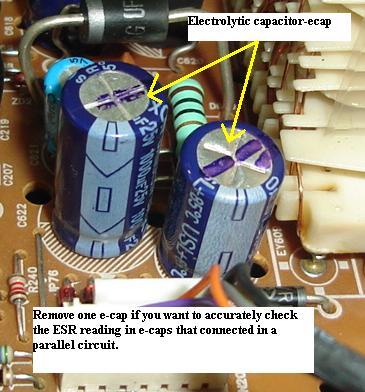
What I mean ESR meter can’t test accurately on board in all circuit was that it depends on what type of circuit you are checking! If you check on the Monitor heater circuit, it would not give you an accurate reading because the heater line is eventually go to cold ground through the filament inside the CRT tube. In other words you are actually measuring the low resistance winding of the filament. The same case also happen if you try to check any E-caps that have a low ohm resistor parallel with the e-caps that you want to check. Another good example would be the secondary output lines. Have you ever come across secondary output lines that have few electrolytic capacitors along the same line? Yes, that’s mean if one of the e-caps turned bad the ESR meter would test the E-caps as good because the same line have another good e-caps there. Don’t be discouraged by the examples that I’ve explained above. In fact those are not just examples; it was the real life experienced that I had encountered as electronic repairer.
Do not worry about the above explanations as there are solutions for it. First, before using ESR meter on any e-caps, please make sure to ask yourself “what kind of circuit that I’m checking now?” If it is a heater circuit or secondary output lines that have few e-caps that connected in parallel, you have to desolder one lead of the e-caps and test it with your ESR meter. Otherwise you would not get an accurate result from your ESR meter. After reading the above example I’m sure you would be careful next time when you want to check for bad e-caps on board. One more advice, never check the e-caps with a digital capacitance meter as a bad e-cap the meter will tell you it is good and you will be wasting of your precious time trying to find out the real fault in the equipment.
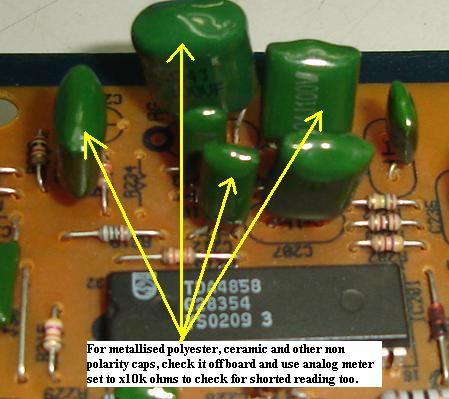
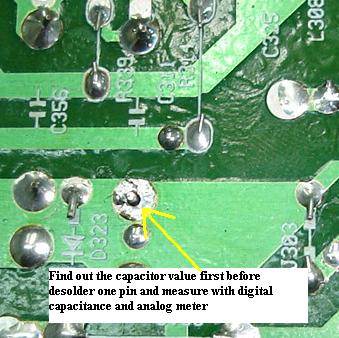
Next is the non polarity capacitor, you have to desolder on lead in order to test the capacitance. You can’t measure the non polarity capacitor on board as the digital capacitor meter doesn’t have the capability to check on board not like the ESR meter. After you have confirmed that the capacitance is good you need to perform another test which is using analog meter set to X 10 k ohm to check for any short circuit between the internal plates. If the capacitor that you want to check rated several hundreds volts then I guess you have to use an insulation tester to check it. In other words, your analog meter does not have the feature that can pump in hundreds of volt to a non-polarity capacitor. Just let the insulation tester do the job.
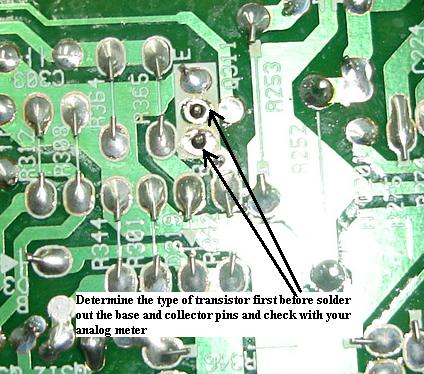
The last component that I want to share in this article is the bipolar transistor. You can actually check transistor on board without removing it to speed up your repair work. First you must know as which types of the transistor that you want to measure belong to. It can be either NPN or the PNP. Assuming you have checked that the transistor is NPN type, then desolder the base and the collector pin. Do not desolder the emitter pin. Place your analog meter black probe to base (meter set to X 1 ohm) and the red probe to collector and then to the emitter pin. It should give two similar reading but not shorted readings! Now set your meter to X 10 K ohms and place your meter probes to the collector and the emitter pins (either way). Some good transistors can show no reading on both ways while some will show only one reading but not shorted reading. If you get two readings then the transistor is considered bad and need replacement.
Conclusion- I really hope that you can start practicing the methods that I’ve covered in the part one and part two of this articles. Hands on practice only make us perfect and the result would be you can check any electronic components in the shortest time and accurate too. However, you have to remember that electronic components can test good but breakdown when under full load. Your experience will tell you if the components need a direct replacement. That’s all for today and see you again on next weekend.God Bless!
|
|
Copyright@ 2006-2014-www.ElectronicRepairGuide.com All Rights Reserved
 I
personally owns an inductance meter and when I compared a known
good yoke coil with a bad one, the result was still the same (good
inductance value) but when I compared and checked it with dick
smith meter, it clearly distinguish between the good and the bad
yoke coil. Horizontal yoke coils can breakdown when under full load
just like the flyback transformer, so be alert and if you can’t
solve any weird problems monitors especially power intermittent
cycling, horizontal width intermittently big and small with
pincushion out, HOT turned very hot in a short time then you have
to direct replace the CRT and retest again.